Getting Started
Overview
This document contains a brief overview of BestMARC's major features to help get you up and running. Each section has a link to more detailed information in the user guide.
Remember that Mitinet also offers free training webinars and technical support is included in your subscription, so don't hesitate to Contact Us with questions or comments.
If you have used Mitinet's MARC Magician software, see the Getting Started for MARC Magician Users document.
Profile
The first thing to do in BestMARC is to set up your Profile. Click on the Profile link at the top of the screen
to view and update your profile at any time.
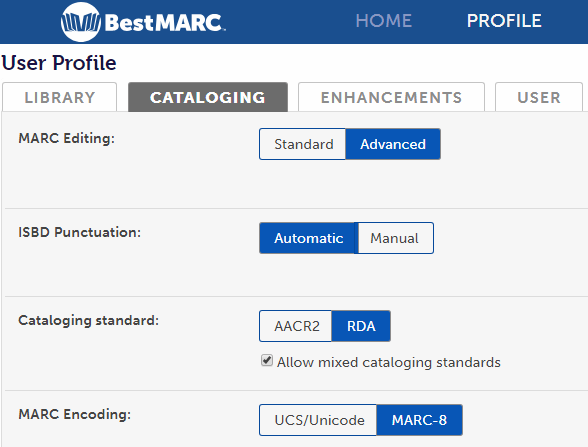
Setting your Library automation system lets BestMARC know what Integrated Library System (ILS) or automation system you use so it knows where your holdings information is stored as well as other software-specific functions. If you do not see
your system in the list, select Custom... and enter where your holdings data is stored. Many ILS systems allow holdings to be customized so BestMARC cannot automatically determine your settings.
Go through each tab of settings, setting your desired options and then click Save at the bottom. Throughout BestMARC, your profile settings will be used to customize your experience.
Record Type: Bibliographic / Authority
BestMARC supports working with both Bibliographic and Authority MARC records. At any given time, BestMARC can work on one or the other of these types. This is controlled by the
MARC Record Type dropdown in the upper-right of the screen:
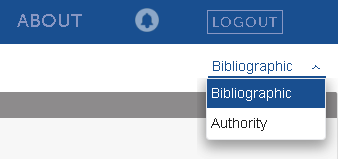
BestMARC always defaults to Bibliographic mode and unless otherwise noted, this User Guide always assumes Bibliographic.
For details about Authority, see the Working with Authority records document.
My Records
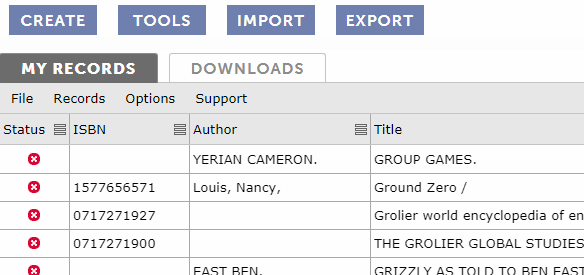
Records that you import or create are stored in BestMARC's My Records grid.
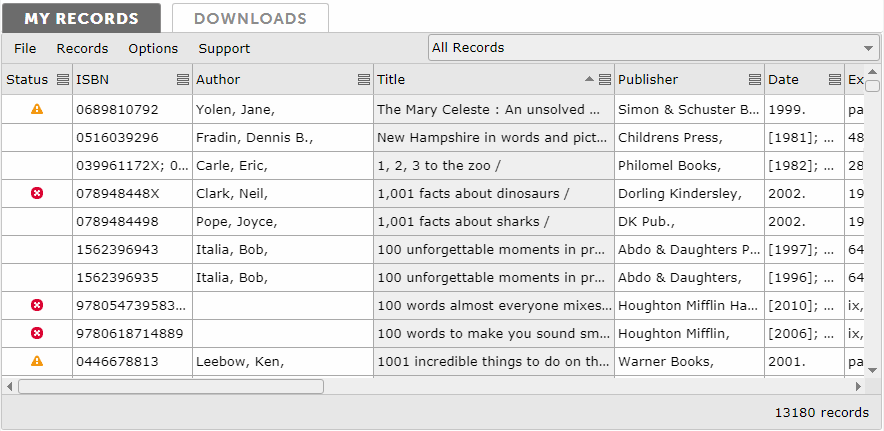
Scroll through your records using your mouse wheel or the scrollbar on the right.
The sort column is highlighted and has an up or down arrow in the column's header.
Click the menu icon at the right of a column's header to open a menu with sort options and filtering to search your records.
Double-click a record to open it in the MARC editor or right-click on it for more options.
In addition to the standard columns, you can configure custom columns in your profile to show whatever MARC fields you'd like.
The panes at the top open various commands and tools in BestMARC. The currently-opened pane is in green.
Click on the currently-opened (green) pane's button to close all panes. This expands My Records to show more records at a time.
MARC Editor
The MARC record editor, also known as the cataloger, is where you make changes to the details of an individual MARC record.
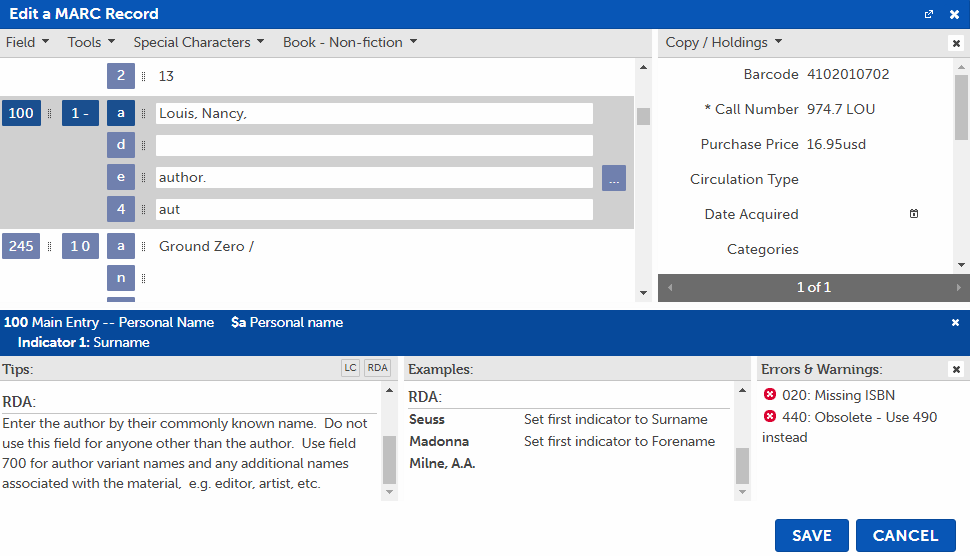
The left pane contains the editor. Click on a button to open a context menu related to field, indicator, or subfield. Click a menu item at the top to open a menu of additional options.
-
Click the ... button to the right of some fields to open a window that helps you enter data in this field. This is often in places where there is a defined list of values that can be entered. Typing into this field also drops down a list of possible values.
The right pane contains holdings fields for this record. Click the arrows at the bottom to see the next or previous holding.
The bottom pane contains context-sensitive tips and examples related to the subfield that is currently selected above.
The Errors and Warnings pane shows problems with your record. Click on an error or warning to take you to that field or subfield in the record.
Subject Explorer
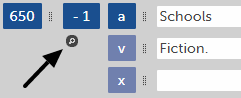
BestMARC's editor has a tool called Subject Explorer to help you find additional subject headings.
Under the Tools menu, choose Subject Explorer to open it, or click the Explore Subject button next to a subject or Dewey.
The Subject Explorer window opens:
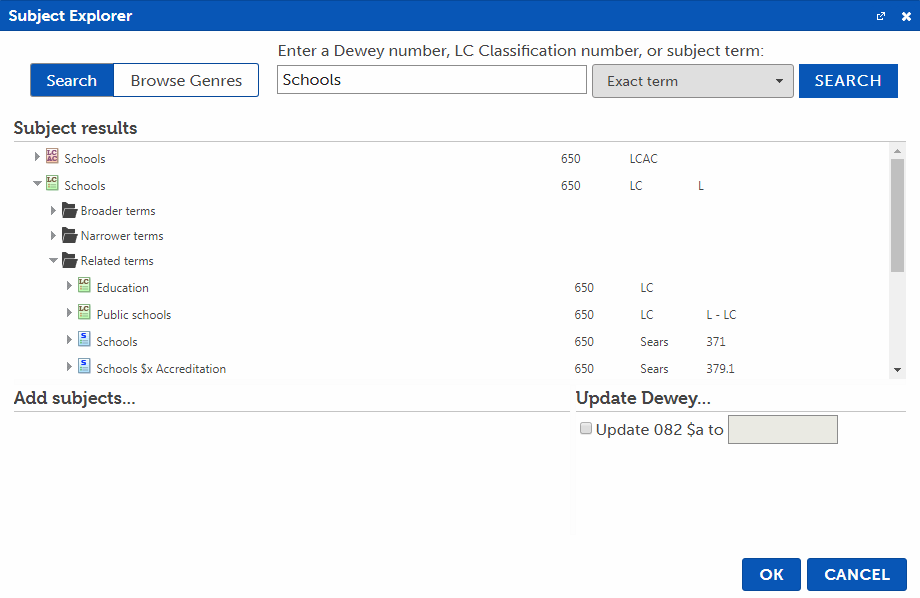
Enter search options at the top to explore LC, LCAC, Sears, and Genre terms. Click the arrow next to a term to see Broader, Narrower, and Related terms. Click on a row to highlight it. Click Ok to add the selected subject headings to the record.
The tool can also help you find Dewey numbers based on subject. Select a subject. If there is a Dewey number associated with it, it appears in the Update Dewey... section and can be used to update your MARC record with the selected Dewey.
Cataloging and Templates
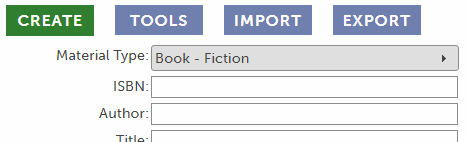
Select Create in the top pane to create new records. BestMARC has a record source so you can first search for and use already created records.
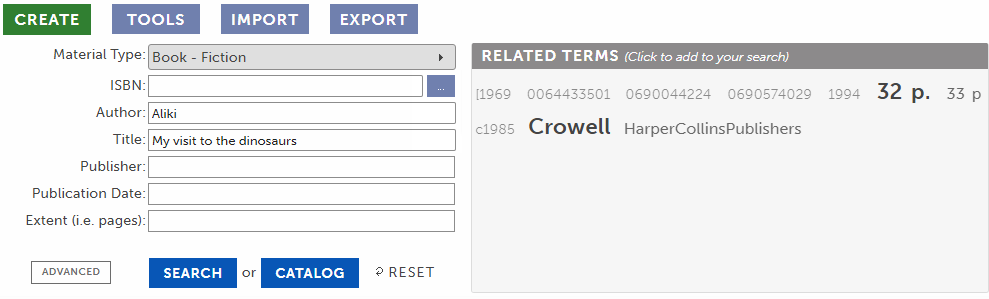
Enter your search criteria and click Search. You can examine, modify, and Save records into My Records from the search results.
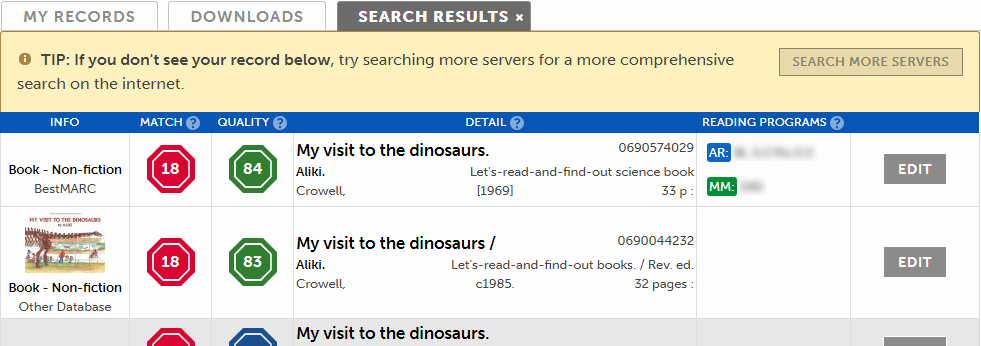
The Search More Servers button will do a more extensive Z39.50 search for additional records if you do not see a results after your initial search.
If you do not find a record, click Catalog:
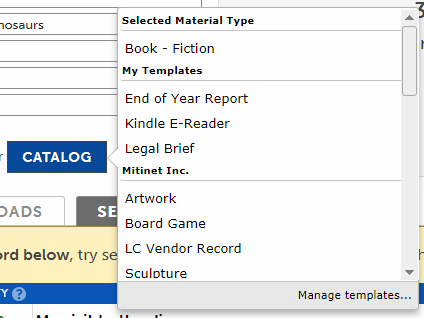
Select the template you'd like to use to create this MARC record. You can choose from the selected material type from the search page, one of your Templates,
or one of the templates that were shared among your colleagues.
Templates can be private to you, or shared at the school or district level so all members of that school or any school in the district can use the same template. Only the author of the template or your BestMARC Account Manager can make changes to a template.
Click the Manage templates... link to create or manage your templates.
After selecting a template, the MARC editor opens and anything you've typed into the BestMARC search boxes automatically override the fields of your template.
Enhancements
Ensure your database is most up-to-date by running it through our continually-updated data Enhancements. Each performs a different task such as
automatically converting records to RDA, adding awards notes, fixing record errors, updating reading programs to the latest scores, and subject headings to the latest terms.
Select the Tools pane and open the Enhancements folder.
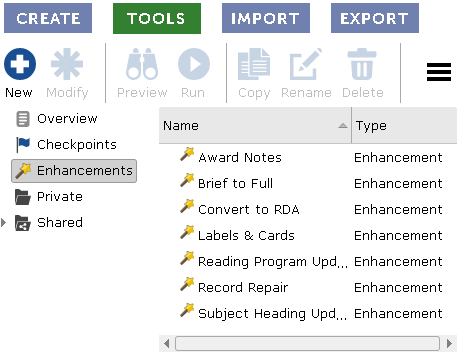
Select the enhancement you want and then click Run.
Options for enhancements are set in your Profile. Enhancements can be combined into a Workflow, which you can also run when you import a file.
Global Editing
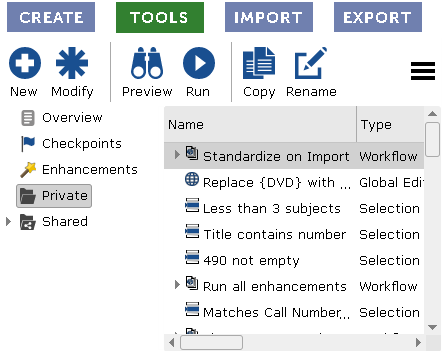
Global Edits are saved commands that you set up once, giving them your own custom name. Once you configure a Global Edit, it appears on the Tools pane and is run by selecting it and clicking the Run button.
You can run it without re-configuring it each time and it is saved between sessions.
Here are some additional things you can do using Global Edits in BestMARC:
-
Preview - See a side-by-side sample of what your records would look like after you run a Global Edit. Useful for testing them the first time.
-
Copy - If you have a Global Edit that is already working, make a copy of it and make changes to the copy.
-
Workflows - Group together a series of Global Edits to run in sequence. This allows to you build a comprehensive series of steps and run all of them in a single click.
-
Share - Share Global Edits and Workflows among your colleagues. Cataloging staff can save time and resources, as well as improve record consistency, by using the same Global Edits across all users.
Click New to create a new Global Edit or Workflow.
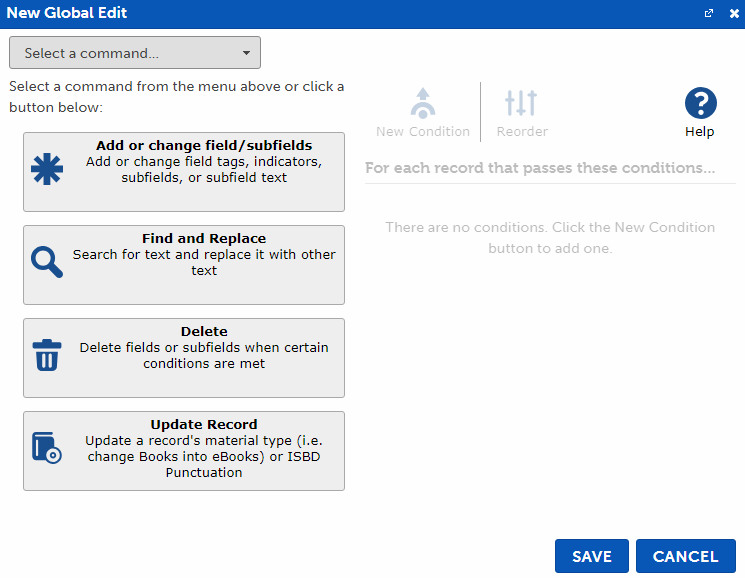
Select one of the four global edit types depending on what you are trying to do.
The options on the left change based on the type of global edit you've selected. Usually, you must first select the MARC field you wish to update.
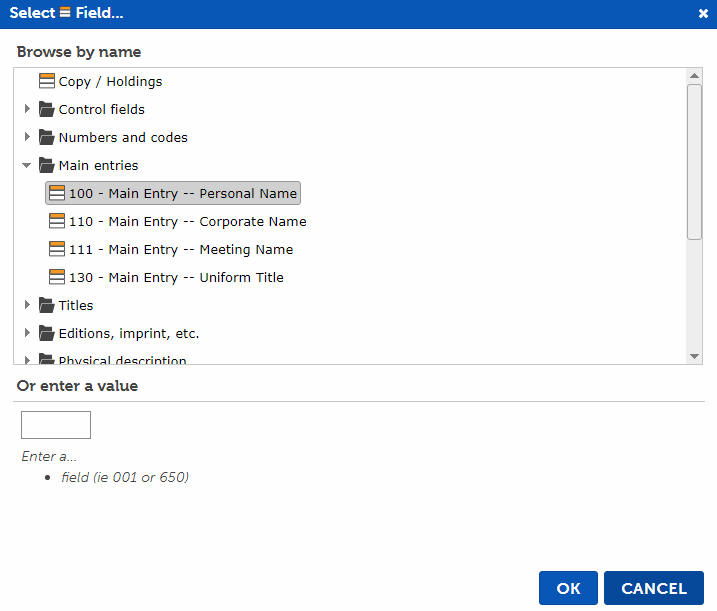
To make changes to your holdings, select Copy/Holdings (the first item). This lets you select holding fields by name based on the automation system you've set up in your profile.
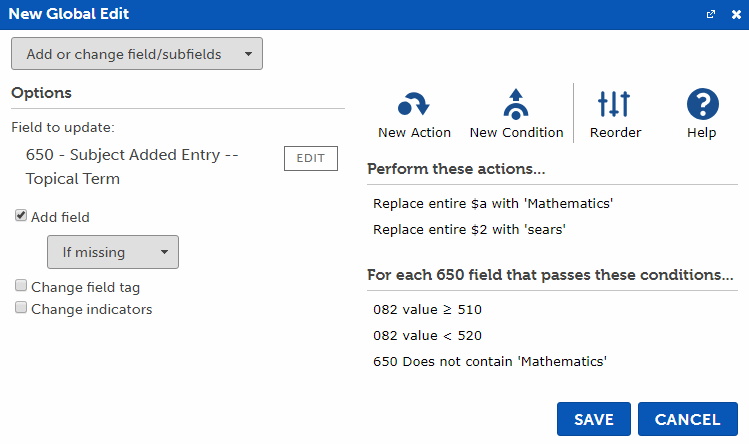
When working with subfields, you can add Actions to select how you want to change the field.
You can also specify Conditions the record must meet for the Global Edit to make changes. For instance:
Lists and Selections
You can create different lists of records BestMARC so you can look at smaller sets of records. Lists are changed using the dropdown at the top of your records grid. It defaults to All Records,
which will always show everything.

Click the Manage lists... link to create or manage your lists.
You can put records into lists during import, by right-clicking on selected records and choosing Add to list..., or in batch by using Selections on the Tools pane.
Selections are similar to global edits
but they only have conditions. When you run the selection, records that pass the conditions can be added or removed from a list.
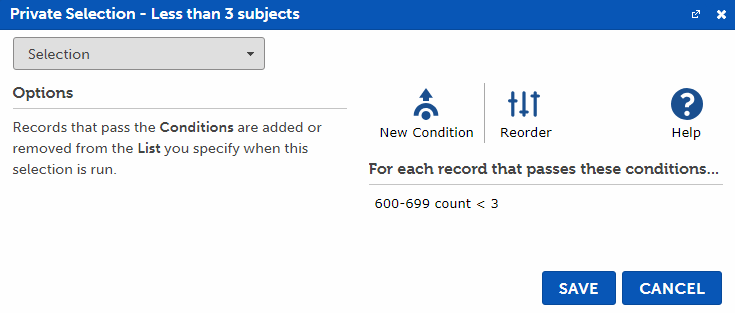
Like global edits, selections are saved with the name you give them so you only need to set them up once and then you can run them by name at any time.
Importing Records
Select Import in the top pane to bring records into BestMARC:
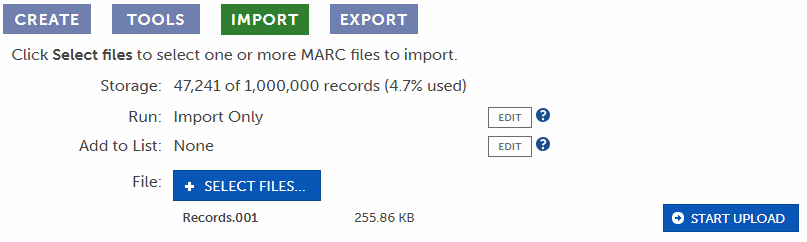
You can optionally select a Global edit or Workflow
to run during import. Enhancements can be added to a Workflow to run at this time as well.
Many of our users like to create different workflows based on vendor or school and run the appropriate one during import to save time. You can always run them after import on the Tools pane.
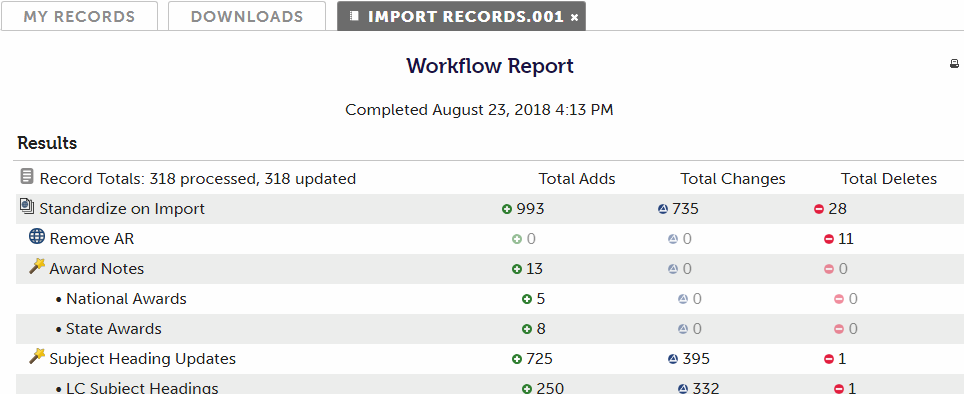
After import, you will receive a report listing the numbers of changes made during import.
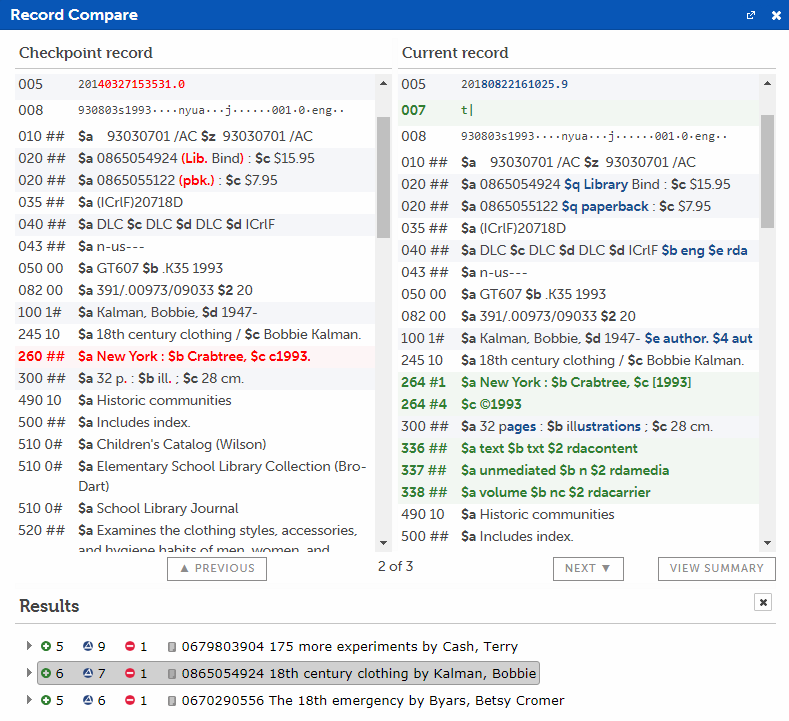
You also have the ability to see a side-by-side comparison of exactly what changed at the record level.
Right-click a record and choose Compare to see the changes between the original record and what was changed upon import.
Exporting Records
Select Export in the top pane to get records out of BestMARC:
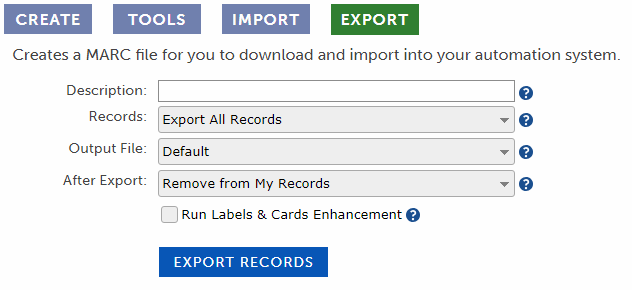
Several Export options are listed on the screen.
-
Change the Records option to export all of your records or just the records you've selected.
-
The Output File option lets you export just records with changes if you are working exclusively with records already in your automation system.
This will improve import speed when loading your records back into your automation system.
-
The After export option lets you choose whether to leave exported records in BestMARC or remove them.
-
BestMARC can also create PDF files for you to print on label or card stock upon export. Check the Run Labels & Cards enhancement box. The files created are based on the options you've already set in your Profile.
Click Export Records when your options are set. When complete, a file of your MARC records (and optional label and card files) is created and listed on your Downloads tab. Because BestMARC
is cloud-based and is not installed on your computer, you will now need to download these files to your computer.
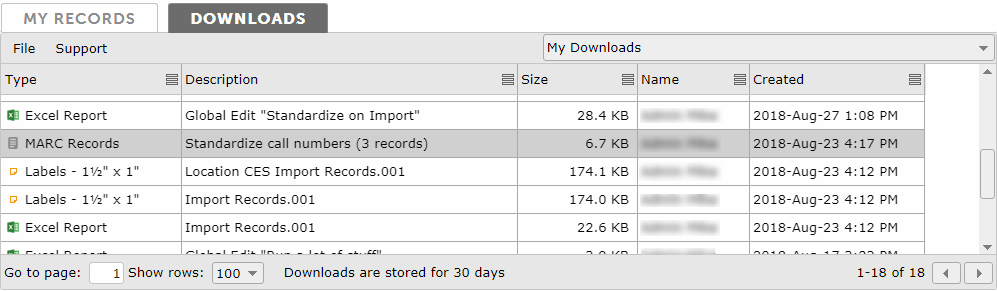
Double-click a row to download that file to your computer. You can see downloads from your colleagues by changing the filter in the upper-right of the downloads window.
BestMARC also offers an easy way to bring these records back into My Records; right click on a download and choose Import.